

We are elated to announce that we recently launched our most anticipated update: a brand new Getting Started flow!
Let’s dive in.
What is Getting Started?
The Getting Started journey consists of 4 comprehensive yet easy to follow steps to help you set up Knit and start using our powerful syncs and unified APIs quickly!
In this guide, we will walk you through everything from registering webhooks and setting up the UI component to finally making API calls and syncing data.
Step 1: Select Category
First, you’ll have to select a category of integrations that you’re interested in. This would enable you to walk through that category’s events and APIs and get started with it immediately.
Don’t worry, if you’re interested in multiple categories, once you’ve completed all the steps for one category, you can come back and select another one.

Step 2: Register webhook
If the category supports data sync, you’ll be prompted to register a webhook for it. If not, then you can skip this step and move directly to the next!
But before we get into the details of this step, let’s first discuss what a webhook is. Simply put, we use webhooks to send you information. So, a webhook URL is like an address wherein you tell us where to find you in case we have some data for you. So, before we begin with the rest of the stuff, you’ve got to tell us where to find you!
In this step, you’ll be able to register the webhook wherein we’ll send you sync events. While registering the URL, you can also see the different kinds of events that we’ll be sending in different circumstances and test your webhook against them. As Knit works on a completely webhooks-first design, no polling is required for data sync.
Once you’ve successfully registered the webhook, you can then enable the category to start integrating with apps.

Step 3: Setup Knit UI
In this step, you should get your API key, and be able to integrate with an app from the frontend using either of the following two methods.
1) By embedding Knit UI
Embedding the Knit UI component lets your users make native integrations from within your app. In this step, we help you get your API Key, set up your backend to make auth sessions, and ultimately embed the Knit UI SDK in your frontend. We have comprehensive code snippets for all the popular frameworks in JavaScript TypeScript for you to refer to.
2) Use the Magic Link
If you don’t want to embed the UI component in the frontend, or want your users to get started immediately, you can use the Magic Link feature to integrate with an app in the browser.
Just fill the form with the required information like your user’s organization ID, name, user email address doing the integration, and the category they wish to integrate with and you’ll get a link with which you can get started in your browser immediately.
Don’t worry, if you wish to come back and embed the UI component later on, you can find the documentation in the ‘Resources’ section.
.png)
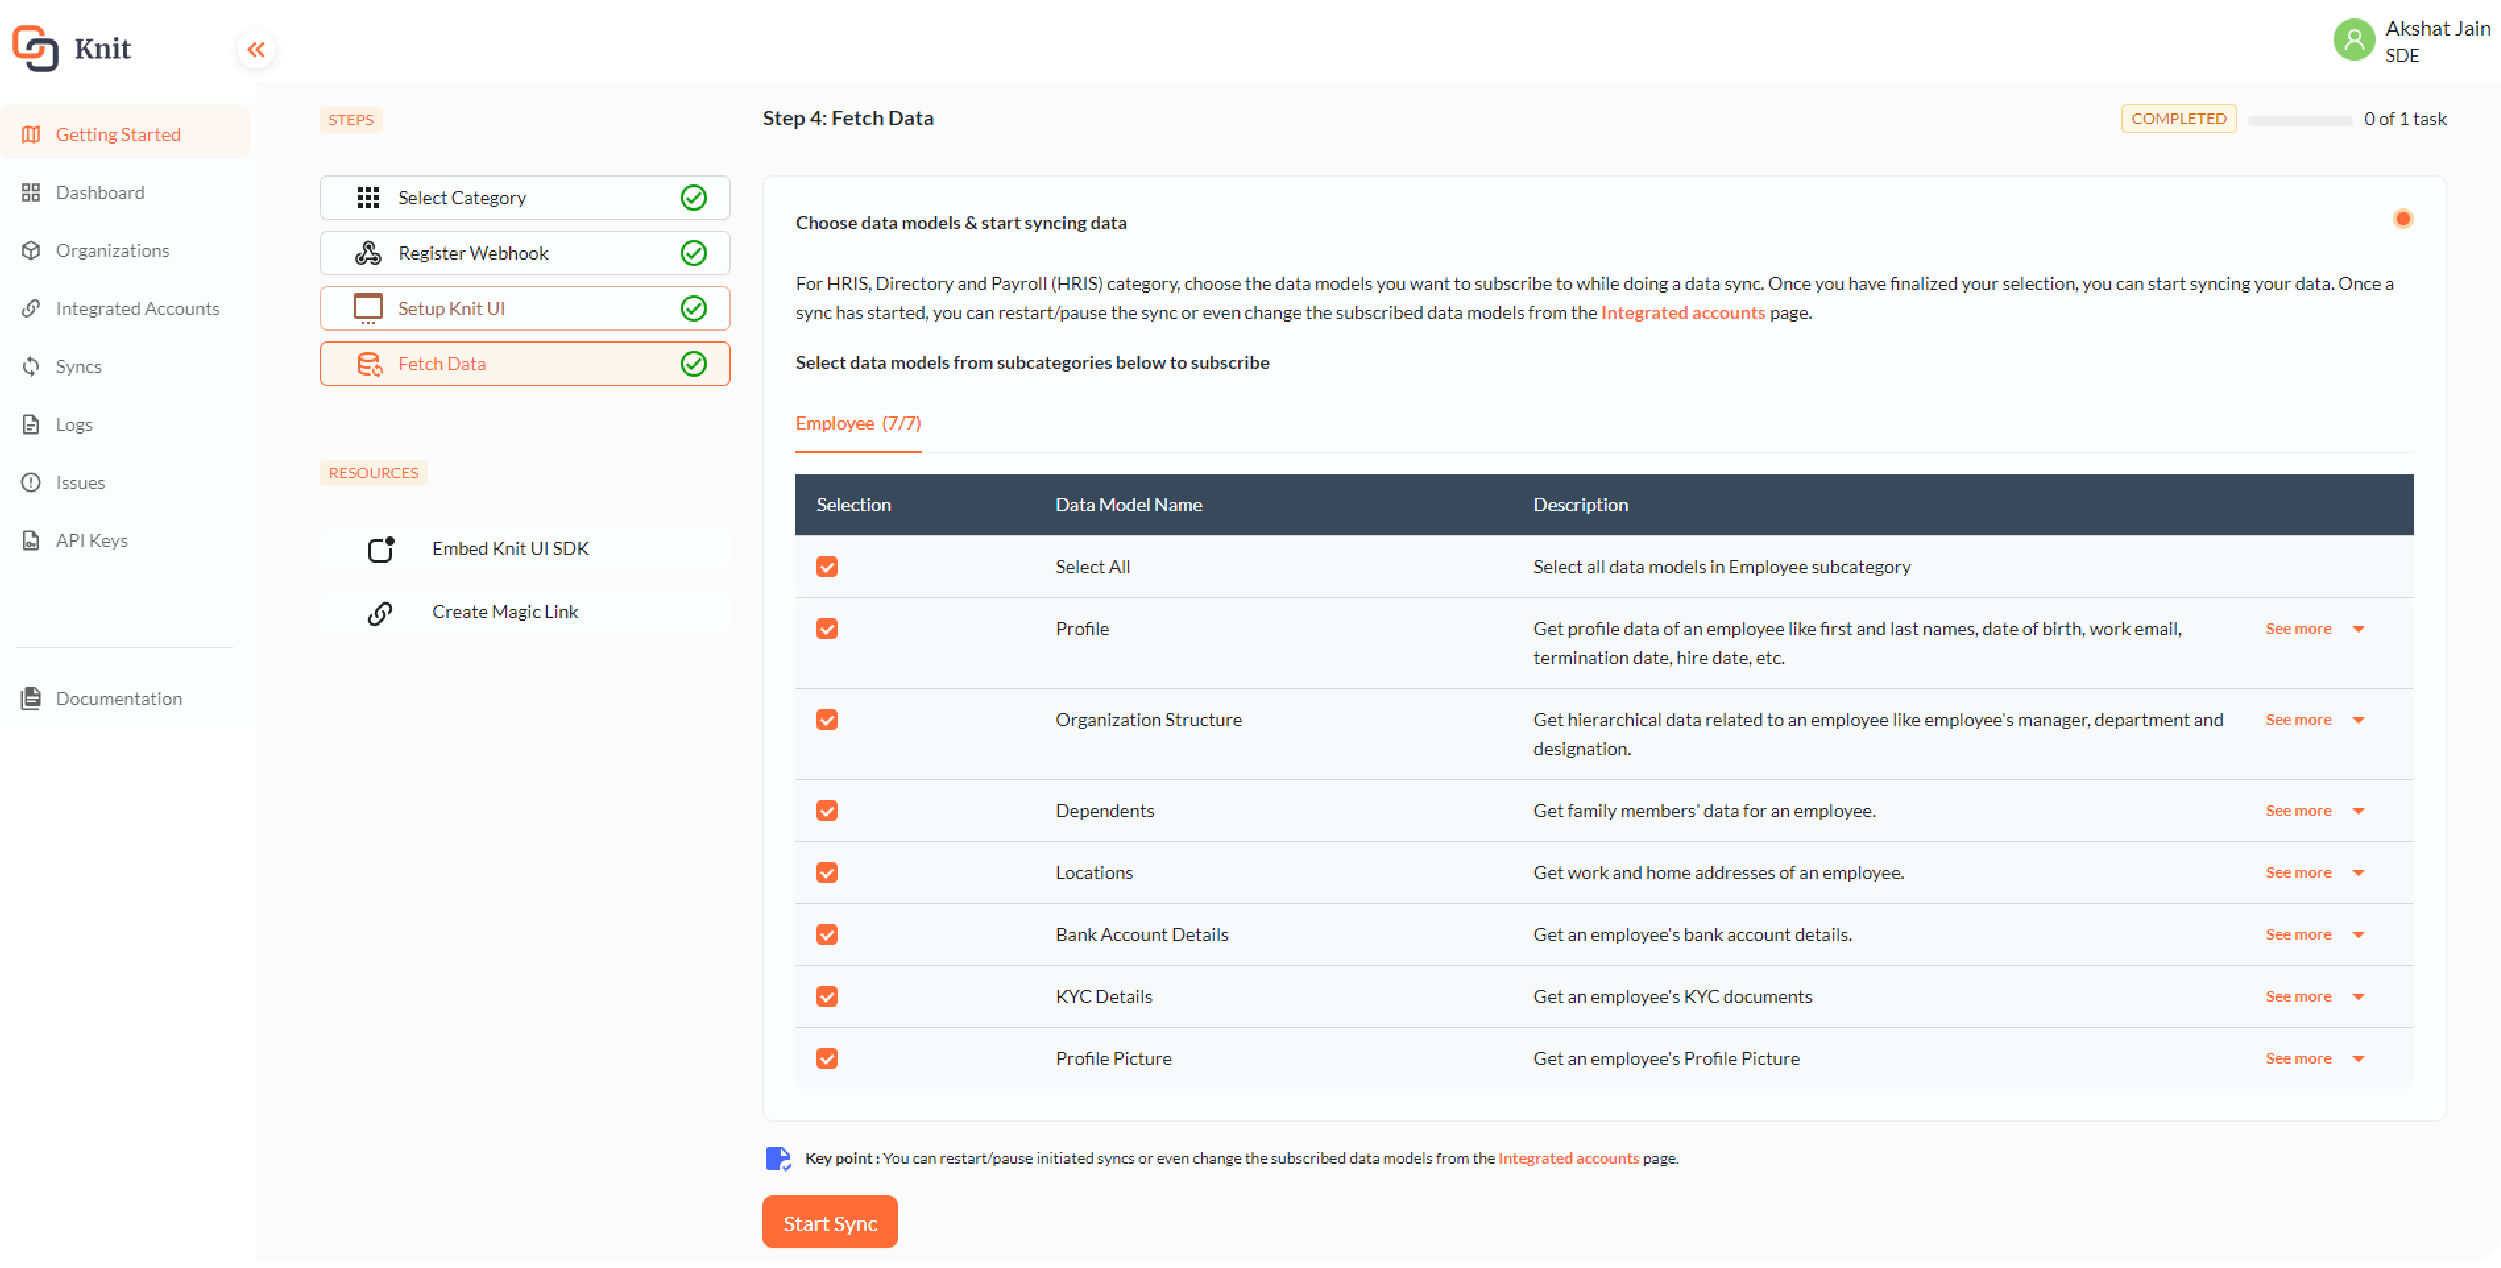
Step 4: Fetch data and make API calls
That’s it! It’s time to start syncing data and making API calls and take advantage of Knit unified APIs and its data models. Depending on the category you’re interested in, you will find detailed information.
If the category supports syncs, like HRIS, ATS, CRM and Accounting, you’ll find the list of data models and syncs we support for that category. You can choose the data models you want to subscribe to while doing a data sync. Once you have finalised your selection, you can start syncing your data.
Once you integrate with an app (if you haven’t done so already), we will immediately start syncing the data of the subscribed data models and sending events to the webhook you had registered in step two. Once a sync has started, you can restart/pause the sync or even change the subscribed data models from the Integrated accounts page.
You can read more about syncs here: How Syncs work
Along with the data models, you’ll also find the documentation references for the APIs supported by the category.
We made it! Now you know everything there is to know about getting started with Knit and how to start integrating applications, syncing data and making API calls.
Be sure to check out our documentation here. You can find all the data models, API reference, and detailed guides about each feature in there!
We’re really excited for you to get started with Knit, and can’t wait to see the amazing things you’ll achieve with it! 🚀


.webp)

